Surface Prep Secrets: How to Achieve a Smooth, Long-Lasting House Paint Finish
There's nothing quite like the satisfaction of a freshly painted house. The crisp lines, the vibrant color, and the enhanced curb appeal can transform a property. But have you ever seen a paint job that starts to peel, crack, or blister just a year or two after it was completed? The culprit is almost never the paint itself. The real secret to a durable, beautiful, and long-lasting finish lies in what happens before the first can of paint is even opened. It's all in the preparation.
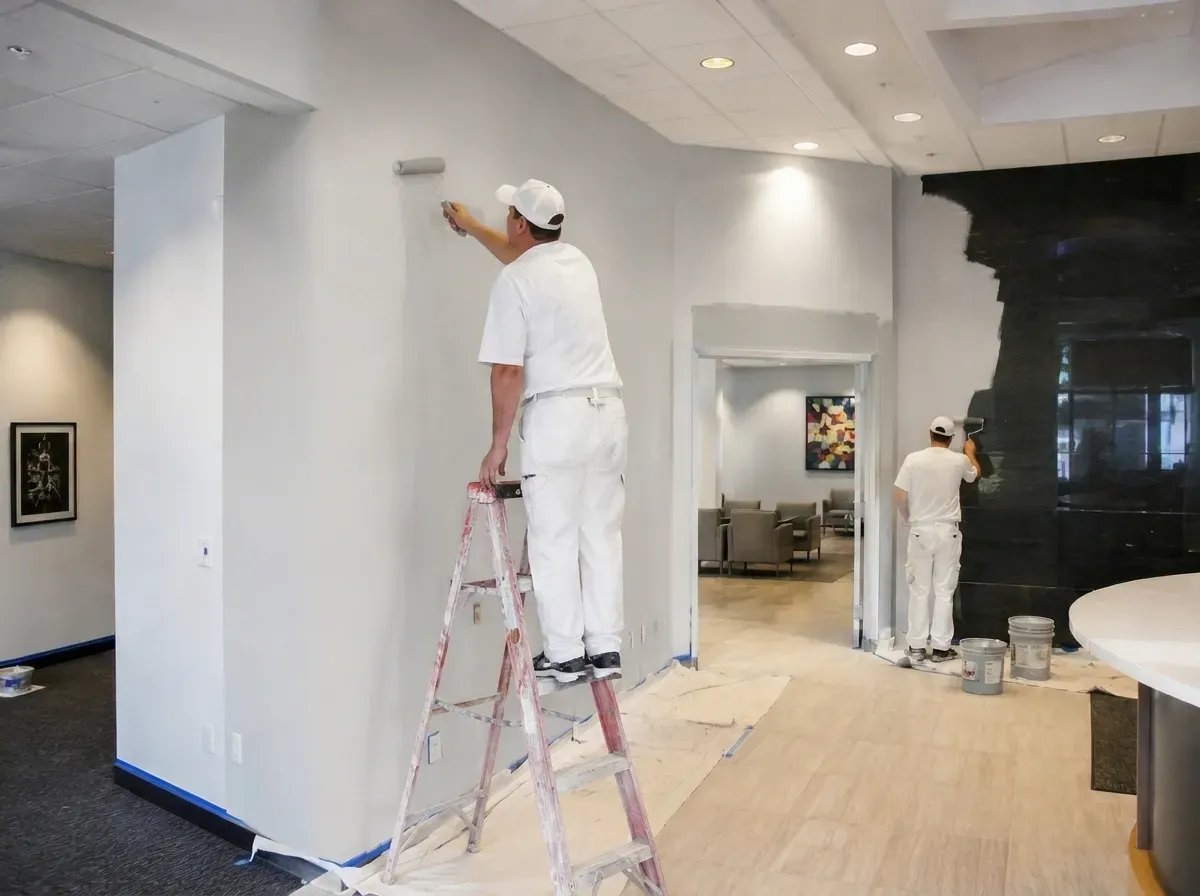
Here at Dunedin House Painting Company, we've seen firsthand how meticulous surface preparation is the foundation of a professional-grade paint job. It's the painstaking, often unglamorous work that separates an amateur attempt from a masterpiece that will protect your home for years to come. This comprehensive guide will pull back the curtain on the essential surface prep secrets that professionals use to achieve that flawless, enduring finish. Whether you're a dedicated DIYer or simply want to understand the work that goes into a quality paint job, these steps are non-negotiable.
Why Surface Preparation is 80% of the Job
It’s a common saying in the painting industry: a great paint job is 80% preparation and 20% application. Why? Because paint is not a magical filler that can cover up underlying issues. It is a thin film that relies completely on the surface beneath it for adhesion and stability. If you apply the best paint in the world over dirt, loose paint, or moisture, it is destined to fail.
- Adhesion: Paint needs a clean, slightly textured, and stable surface to grip onto. Dirt, grime, mildew, and chalky residue create a barrier that prevents the paint from forming a strong bond.
- Durability: Trapped moisture underneath a new paint film will eventually try to escape, causing bubbles and blisters. Unrepaired cracks will transfer through the new paint, and failing old paint will simply take the new coat with it when it peels away.
- Aesthetics: A smooth, uniform surface is essential for a professional look. Bumps, cracks, and uneven textures will be highlighted, not hidden, by a fresh coat of paint.
Investing time and effort into preparation ensures your financial investment in high-quality paint and labor pays off in the long run, saving you from costly repairs and repainting jobs down the road. It's the core philosophy behind all the expert services we offer.
The Essential Surface Prep Toolkit
Before you begin, gathering the right tools is crucial for efficiency and safety. A well-equipped painter is a successful painter. Here’s a checklist of what you'll likely need:
| Tool/Material | Primary Purpose |
|---|---|
| Pressure Washer | Deep cleaning siding, removing dirt, grime, and loose paint. |
| Scrapers & Putty Knives | Manually removing peeling, cracked, and blistered paint. |
| Wire Brush | Scrubbing away stubborn paint chips and rust from metal surfaces. |
| Sanders (Orbital or Sanding Blocks) | Smoothing rough areas and 'feathering' the edges of scraped paint for a seamless finish. |
| Caulk Gun & Exterior-Grade Caulk | Sealing gaps and cracks around windows, doors, and trim to prevent moisture intrusion. |
| Wood Filler or Epoxy | Repairing holes, gouges, and rotten wood. |
| Cleaning Solution (e.g., TSP substitute) | Cutting through grease, grime, and mildew. |
| Primer | Sealing stains, ensuring paint adhesion, and creating a uniform base coat. |
| Drop Cloths & Plastic Sheeting | Protecting landscaping, walkways, and windows from debris and paint. |
| Safety Gear (Goggles, Gloves, Dust Mask) | Protecting yourself from chemicals, dust, and paint chips (especially important for older homes with potential lead paint). |
A Step-by-Step Guide to Flawless Preparation
Ready to tackle the prep work like a pro? Follow this systematic approach for the best results. We follow a similar process at Dunedin House Painting Company to guarantee quality for every project.
Step 1: The Deep Clean - Washing Away the Years
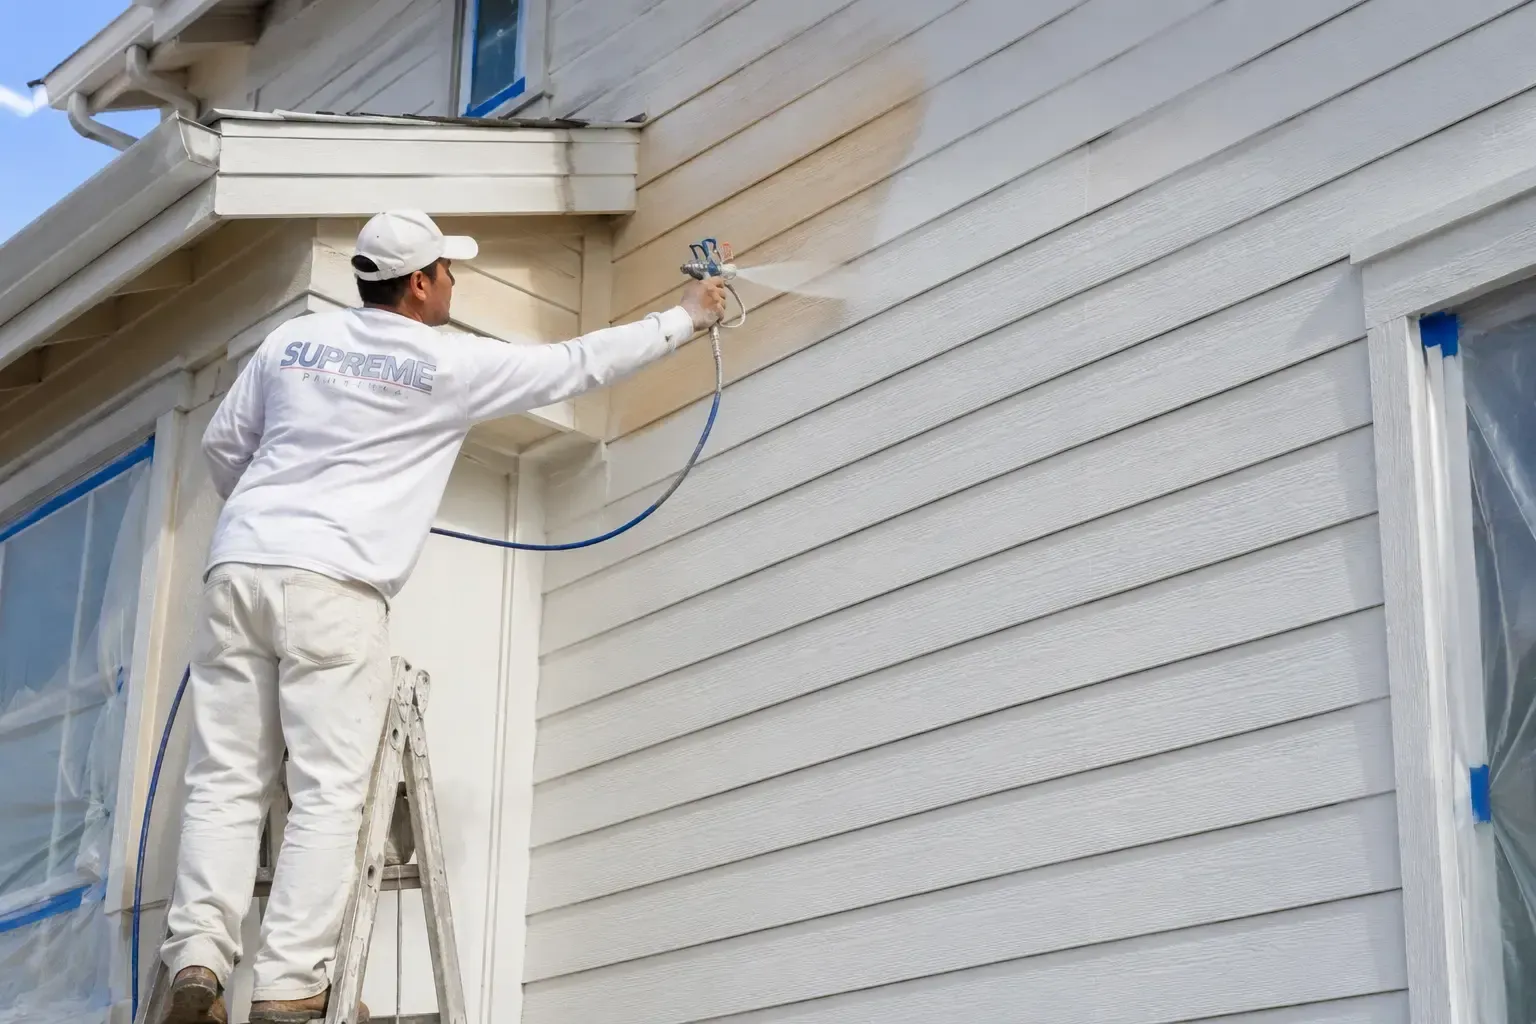
You wouldn't paint a dirty car, and the same logic applies to your house. The first step is always a thorough cleaning. A pressure washer is the most effective tool for this, but it must be used correctly to avoid damaging your siding.
- Technique: Use a wide-angle tip (25 or 40 degrees) and keep the nozzle at least 12-18 inches away from the surface. Work from the top down, washing away years of accumulated dirt, pollen, and chalky residue. Be extremely careful around windows and doors to avoid forcing water into your walls.
- Tackling Mildew: If you see black or green spots, mix a solution of one part bleach to three parts water, or use a commercial mildew cleaner. Apply it with a garden sprayer, let it sit for 10-15 minutes (but don't let it dry), and then rinse thoroughly.
- Drying Time: This is critical. After washing, you must allow the house to dry completely. This can take 24-48 hours, depending on the weather. Painting over a damp surface will trap moisture and lead to blistering and peeling.
Step 2: The Scrape and Sand - Creating a Smooth Canvas
Once the house is clean and dry, it's time to inspect every inch of the surface for failing paint. This is where the hard work truly begins.
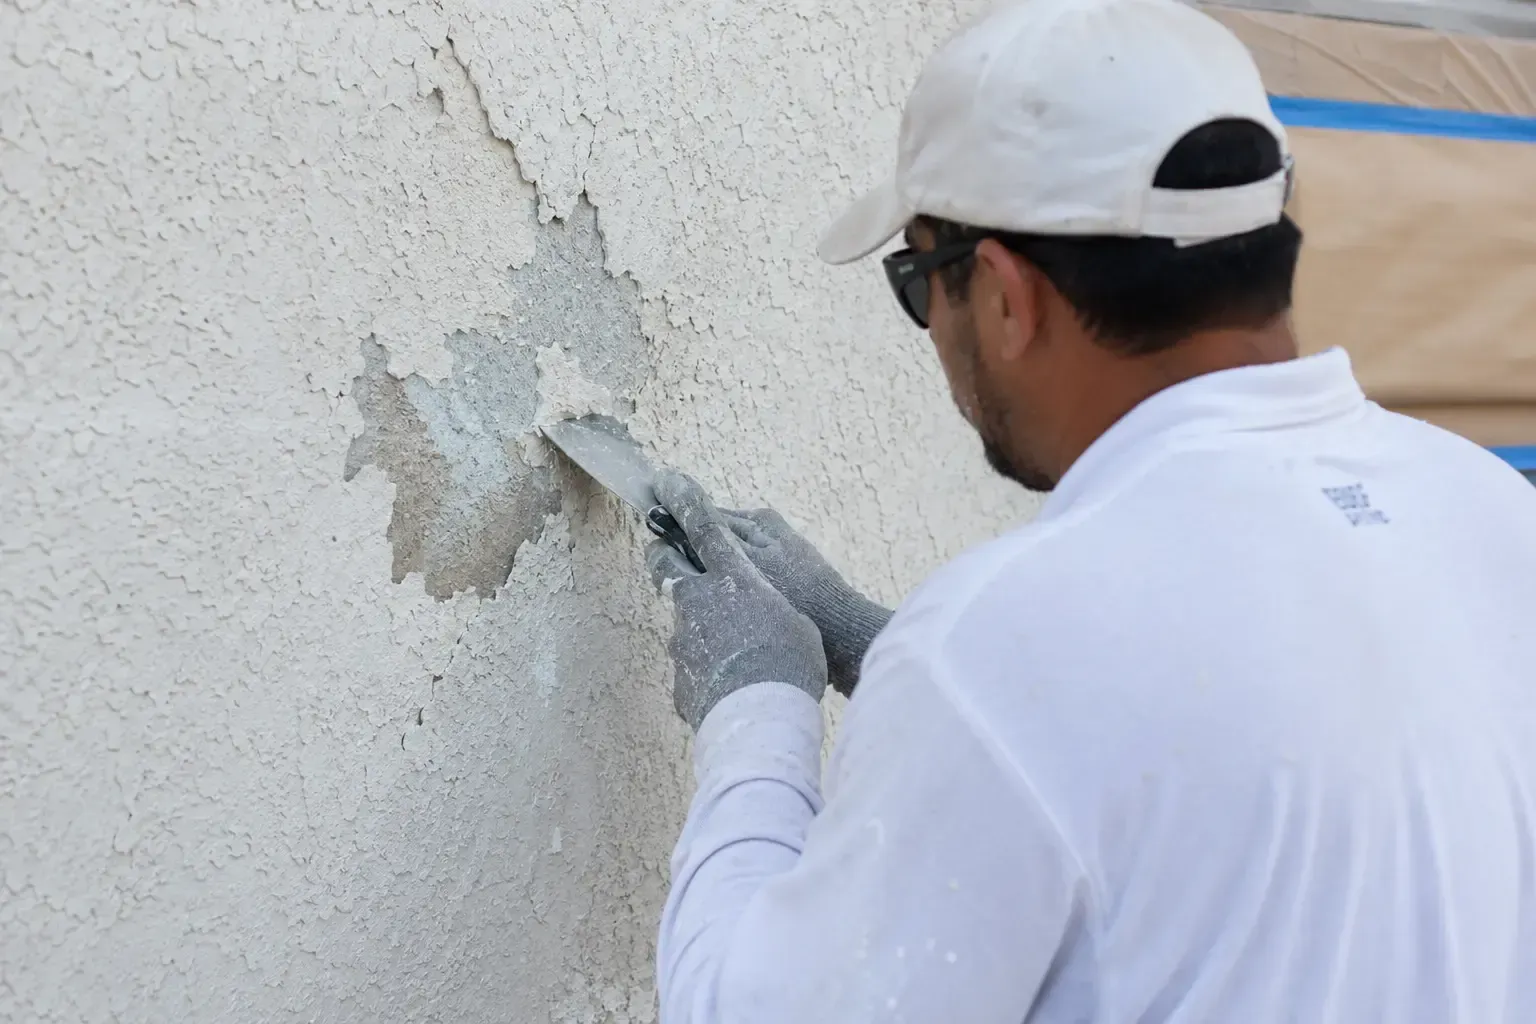
- Scraping: Use a sharp paint scraper or a 5-in-1 tool to methodically remove any paint that is cracking, peeling, or blistering. The goal is to remove anything that is not securely bonded to the surface. If a paint chip comes off easily, it needs to go.
- Sanding: After scraping, you'll be left with ridges between the old paint and the bare surface. To create a smooth, invisible transition, you need to 'feather' these edges. Use an orbital sander with 80-grit sandpaper to smooth these transitions. This single step makes a huge difference in the final appearance.
- Safety Note: If your home was built before 1978, there is a high probability of lead-based paint. Do not dry sand or use high heat to remove it. Consult a professional certified in lead-safe practices. You can learn more about our commitment to safety on our About Us page.
Step 3: The Repair Phase - Fixing Imperfections
With the surface clean and smooth, it's time to repair any damage. A perfect paint job requires a perfect substrate.
- Filling Holes: Use a high-quality exterior wood filler for nail holes and small gouges in wood siding. For larger areas of damage or rot, a two-part epoxy filler is a much more durable and permanent solution. Apply the filler, let it dry completely, and then sand it flush with the surrounding surface.
- Caulking Gaps: Inspect all seams and joints, especially around windows, doors, and trim boards. Old, cracked caulk should be removed. Apply a new bead of high-quality, paintable exterior acrylic or siliconized acrylic caulk. This not only creates a clean look but also seals your home against moisture and air leaks, improving energy efficiency.
Step 4: The Priming Principle - The Unsung Hero
Skipping primer is one of the most common and costly mistakes in painting. Primer is not just thin paint; it's a specialized undercoat designed to solve problems and ensure the topcoat performs as it should. Here at Dunedin House Painting Company, we consider it an essential step.
- Why Prime? Primer serves several key functions: it seals porous surfaces so the topcoat doesn't soak in unevenly; it provides excellent adhesion for the topcoat; it blocks stains from bleeding through (like tannins from wood or rust marks); and it ensures a uniform, even color.
- Spot Priming vs. Full Priming: At a minimum, you must 'spot prime' all bare wood, filler, and patched areas. However, for the most uniform and longest-lasting finish, applying a full coat of primer to the entire house is the professional standard, especially if you are making a significant color change.
- Choosing the Right Primer: For bare wood, an oil-based primer is often best for blocking tannin bleed. For most other applications, a high-quality acrylic latex primer offers great adhesion and flexibility.
Conclusion: The Foundation for Lasting Beauty
As you can see, the secret to a stunning, long-lasting house paint finish is no secret at all—it's a commitment to meticulous, thorough preparation. By cleaning, scraping, sanding, repairing, and priming your home's exterior, you are creating the perfect canvas for your chosen color. You are ensuring that your investment of time, effort, and money will be rewarded with a beautiful finish that protects and enhances your home for many years.
The process is demanding, but the results are worth it. If this detailed work seems overwhelming, don't hesitate to seek professional help. A reputable painting company will have the tools, experience, and dedication to execute every step flawlessly. If you'd like an expert assessment and a finish that's guaranteed to last, please contact us. We're passionate about bringing lasting beauty to homes.
Frequently Asked Questions
How long should I wait for the house to dry after pressure washing?
You should wait at least 24 to 48 hours after pressure washing before you begin scraping, sanding, or painting. The surface must be completely dry to the touch, and it's best to wait an extra day in humid conditions or on shaded sides of the house to ensure all moisture has evaporated from cracks and pores.
Do I really need to prime if my paint has primer in it?
Yes, in most cases. While 'paint-and-primer-in-one' products have improved, they are not a substitute for a dedicated primer on problem surfaces. For bare wood, stained areas, glossy surfaces, or significant color changes, a separate coat of a high-quality primer is essential for proper sealing, adhesion, and a uniform finish.
What's the difference between caulk and wood filler?
Caulk is a flexible sealant used for filling gaps and joints where movement is expected, such as between trim and siding or around windows. It creates a waterproof, airtight seal. Wood filler is a rigid, sandable material used to fill holes, gouges, and cracks in the flat surface of the wood itself. It is designed to be sanded smooth to create a seamless repair, not to bridge a moving gap.
Can I just paint over old, peeling paint?
No, you should never paint over peeling or failing paint. The new paint will only adhere to the loose chips, and as soon as the old paint flakes off, it will take your new, expensive coat right along with it. All loose and unstable paint must be scraped and sanded away to create a solid foundation for the new finish.